 AFN ؋ | Afghanistan
 USD $ | United States
 GBP £ | United Kingdom
 HKD HK$ | Hong Kong
 CNY ¥ | China
 JPY ¥ | Japan
 EUR € | Euro
 SBD SI$ | Solomon Islands
 PGK K | Papua New Guinea
 THB ฿ | Thailand
 ILS ₪ | Israel
 VND ₫ | Vietnam
 MGA Ar | Madagascar
 XAG | Silver
 IDR Rp | Indonesia
 HTG G | Haiti
 PHP ₱ | Philippines
 MXN $ | Mexico
 WST WS$ | Samoa
 CAD $ | Canada
 LSL L | Lesotho
 BWP P | Botswana
 KRW ₩ | South Korea
 KWD د.ك | Kuwait
 LAK ₭ | Laos
 LKR Rs | Sri Lanka
 TRY ₺ | Turkey
 PKR Rs | Pakistan
 CHF Fr | Switzerland
 PLN zł | Poland
 QAR ر.ق | Qatar
 NAD N$ | Namibia
 MOP MOP$ | Macau
 EGP ج.م | Egypt
 MWK MK | Malawi
 VES Bs.S | Venezuela
 ECS S/ | Ecuador
 OMR ر.ع. | Oman
 XDR | IMF
 LTL Lt | Lithuania
 TJS SM | Tajikistan
 BBD Bds$ | Barbados
 BRL R$ | Brazil
 BZD BZ$ | Belize
 CRC ₡ | Costa Rica
 IRR ﷼ | Iran
 AED د.إ | United Arab Emirates
 PAB B/ | Panama
 VUV VT | Vanuatu
 DOP RD$ | Dominican Republic
 XOF CFA | West Africa
 AWG ƒ | Aruba
 YER ﷼ | Yemen
 XCD EC$ | East Caribbean
 GHS GH₵ | Ghana
 BDT ৳ | Bangladesh
 SRD $ | Suriname
 GMD D | Gambia
 MVR Rf | Maldives
 SVC $ | El Salvador
 BND B$ | Brunei
 GIP £ | Gibraltar
 SHP £ | Saint Helena
 GTQ Q | Guatemala
 IQD ع.د | Iraq
 AZN ₼ | Azerbaijan
 JOD د.ا | Jordan
 CLP $ | Chile
 BHD .د.ب | Bahrain
 NIO C$ | Nicaragua
 NGN ₦ | Nigeria
 UZS so'm | Uzbekistan
 ERN Nfk | Eritrea
 ANG ƒ | Netherlands
 KYD CI$ | Cayman Islands
 SYP £S | Syria
 SDG ج.س. | Sudan
 LBP ل.ل | Lebanon
 HNL L | Honduras
 DJF Fdj | Djibouti
 TTD TT$ | Trinidad and Tobago
 KHR ៛ | Cambodia
 AOA Kz | Angola
 RWF FRw | Rwanda
 GNF FG | Guinea
 GEL ₾ | Georgia
 FKP £ | Falkland Islands
 BOB Bs. | Bolivia
 CDF FC | Congo
 ETB Br | Ethiopia
 LRD L$ | Liberia
 SOS Sh | Mali
 DZD دج | Algeria
 BIF FBu | Burundi
 SAR ر.س | Saudi Arabia
 UYU $U | Uruguay
 UGX USh | Uganda
 AMD ֏ | Armenia
 MDL L | Moldova
 SGD S$ | Singapore
 LYD ل.د | Libya
 MAD د.م. | Morocco
 ZAR R | South Africa
 TWD NT$ | Taiwan
 HUF Ft | Hungary
 XAF CFA | Central Africa
 SEK kr | Sweden
 RON lei | Romania
 FJD FJ$ | Fiji
 DKK kr | Denmark
 CVE $ | Cape Verde
 RSD din | Serbia
 ISK kr | Iceland
 MZN MT | Mozambique
 ALL L | Albania
 BGN лв | Bulgaria
 BAM KM | Bosnia and Herzegovina
 XPF F | Pacific
 TND د.ت | Tunisia
 JMD J$ | Jamaica
 CNH ¥ | China
 CZK Kč | Czech Republic
 SZL E | Eswatini
 AUD $ | Australia
 NOK kr | Norway
 KES KSh | Kenya
 NZD $ | New Zealand
 MNT ₮ | Mongolia
 RUB ₽ | Russia
 KZT ₸ | Kazakhstan
 XAU | Gold
 KGS с | Kyrgyzstan
 INR ₹ | India
 NPR रू | Nepal
 TOP T$ | Tonga
 ETH Ξ | Ethereum
 SCR ₨ | Seychelles


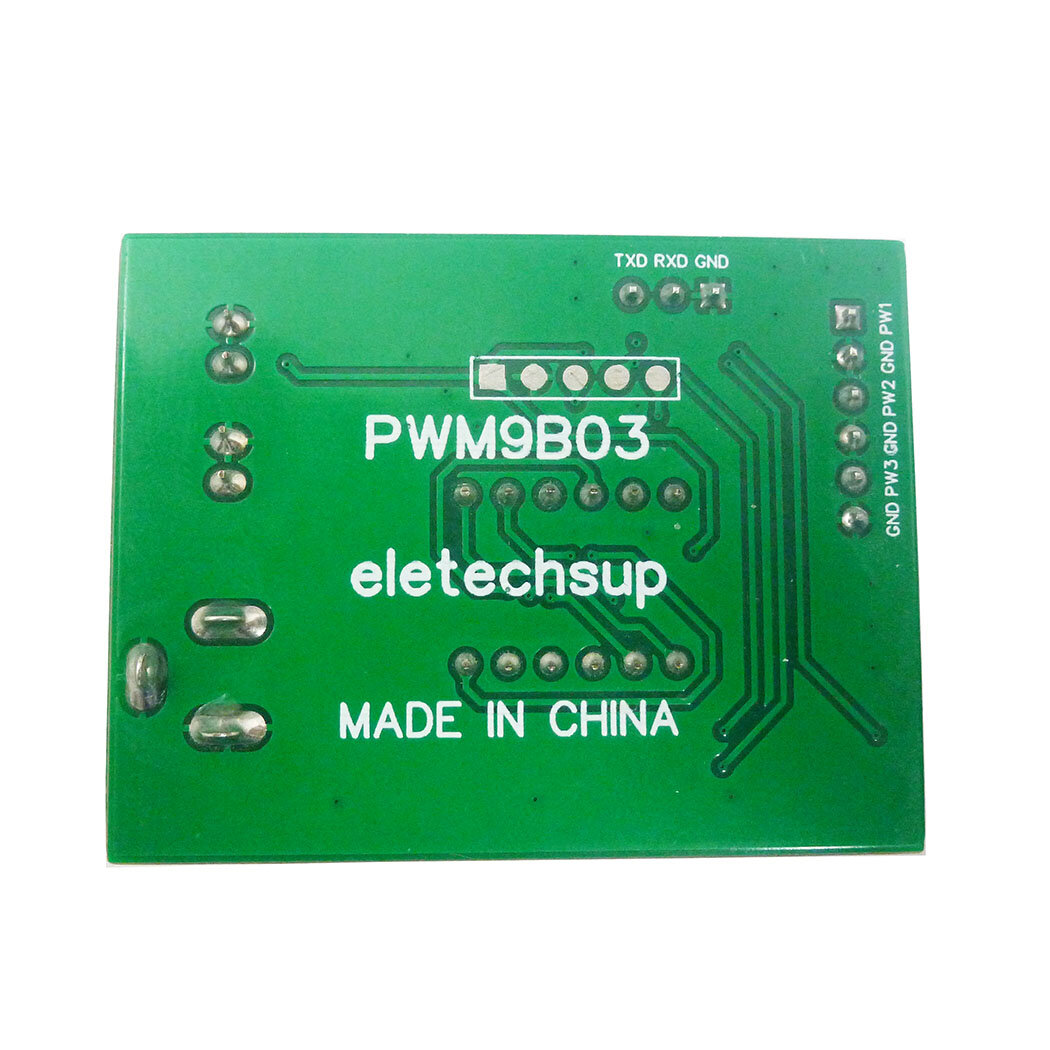
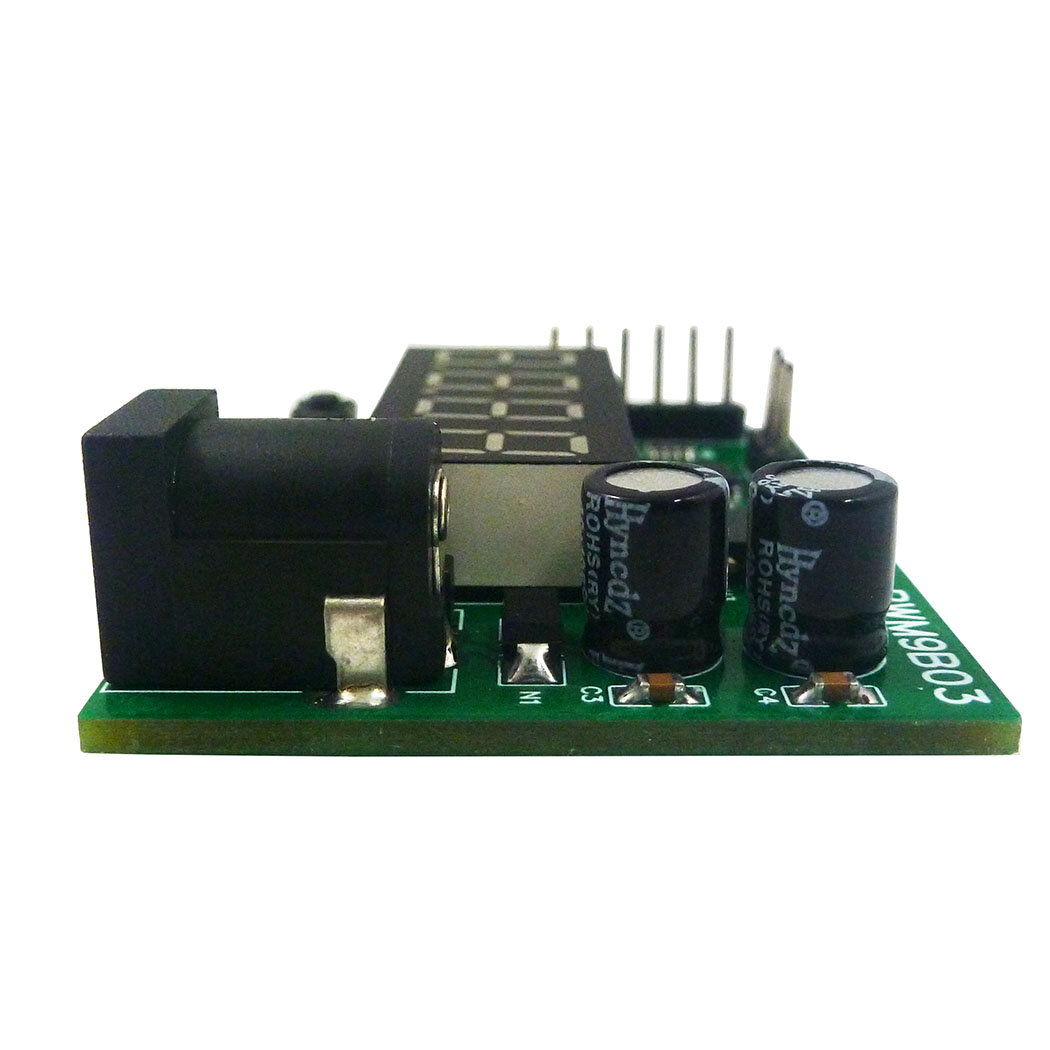

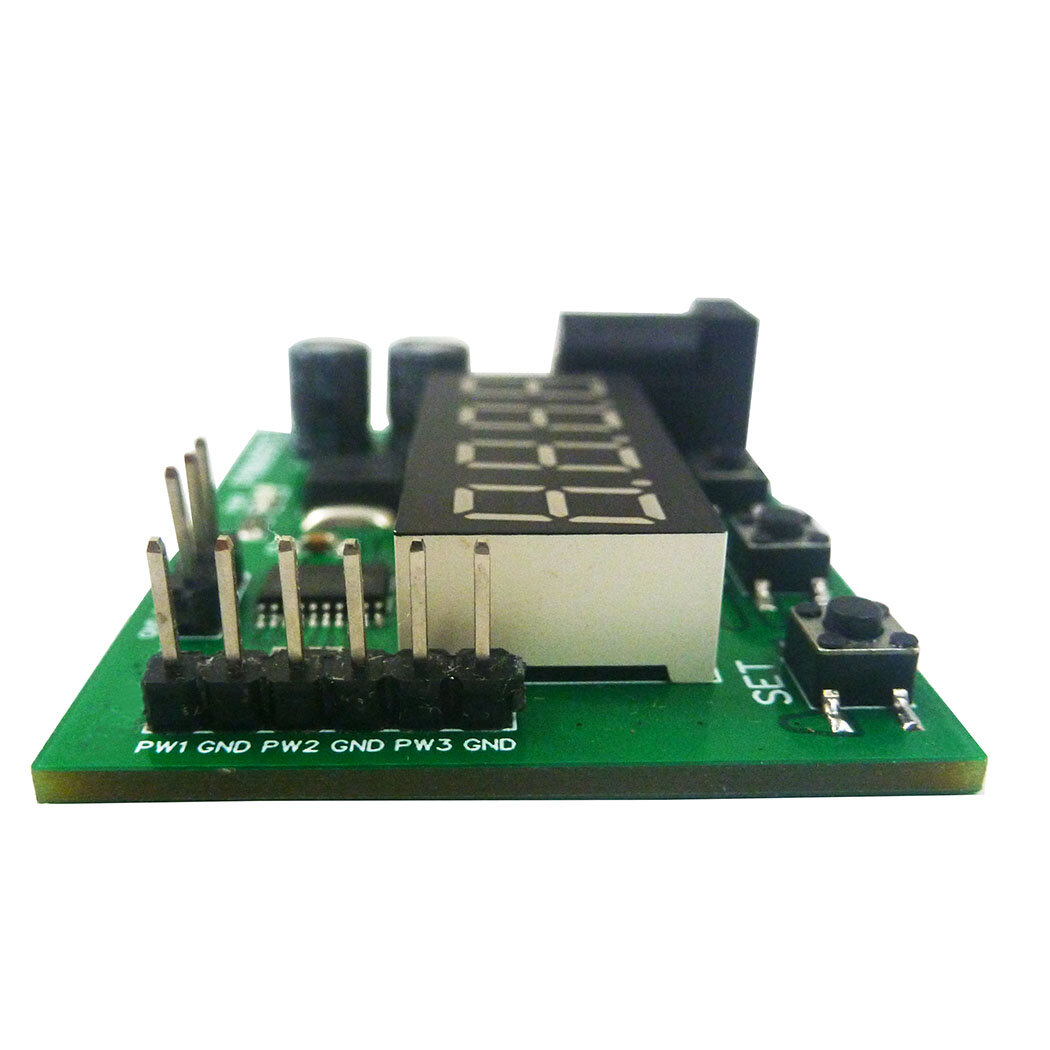
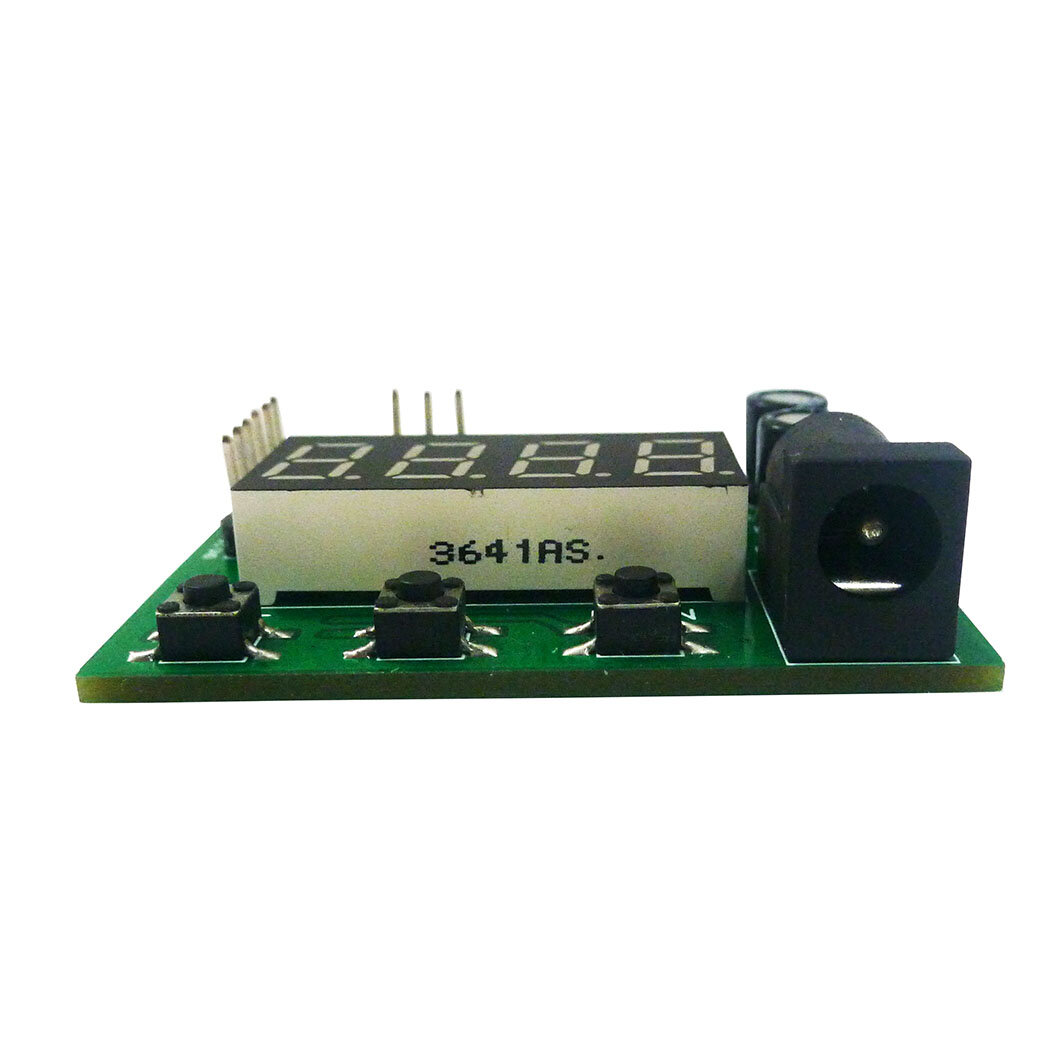
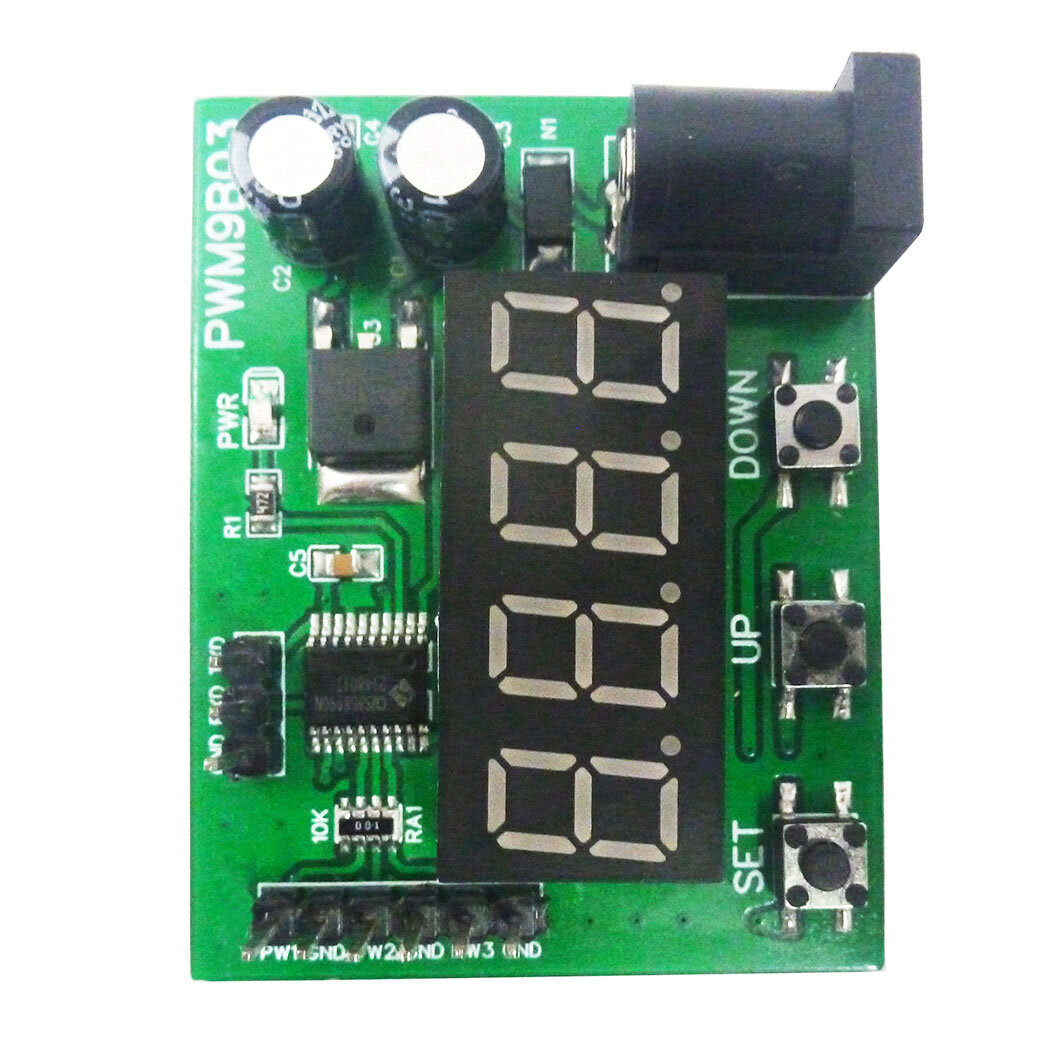
PWM9B03 3-Channel PWM Pulse Signal Generator Module

 Direct purchase from the factory
د پرداخت تضمین

 وړیا ډالۍ
 د لېږد تګلاره
 د راګرځېدو تګلاره
وړیا ډالۍ
Roymall ته ښه راغلاست، د عالي کیفیت ډیپارټمنټ سټور ډالۍ اخیستلو لپاره ستاسو مسلکي ویب پاڼه. موږ ستاسو ملاتړ لوړه ارزښت او تقدیر کوو او زموږ د مننې څرګندولو لپاره ستاسو پیرودونو ته اضافي هیجان اضافه کوو. کله چې تاسو زموږ سره پیرود کوئ، تاسو نه یوازې د لوړ کیفیت محصولاتو څخه خوند اخلئ چې ستاسو ژوند ته ښه والی راوړي، بلکې تاسو به د هرې امر سره یو ځانګړی وړیا ډالۍ هم ترلاسه کوئ. آیا چمتو یاست چې زموږ مجموعه وپلټئ او خپله عالي ډالۍ ومومئ؟ زموږ د عالي کیفیت ډیپارټمنټ سټور توکو انتخاب وګورئ، خپله امر وکړئ او ستاسو د پیرود سره د ستاسو وړیا ډالۍ راتلو هیجان ته تمه ولرئ.د لېږد تګلاره
موږ به ستاسو امرونه ترلاسه کولو وروسته ستاسو لپاره توکي ورسوو او ډاډ ترلاسه کوو چې په خوندي توګه ورسي. د تحویلي توضیحات به ستاسو د تایید بریښنالیک کې وړاندې شي.په ډیری مواردو کې، امرونه په 2 ورځو کې پروسس کیږي.په ځانګړو حالاتو کې، دا په لاندې ډول بهیروی: کله چې تاسو په شنبه، یکشنبه یا عامه رخصتي کې امر وکړئ، دا به 2 ورځې وځنډوي..معمولا, 5-7 کار ورځې (د دو شنبې څخه تر جمعې) ته اړتیا لري پرته له دې چې د الوتکې وځنډ یا نور چاپېریالي عواملو څخه اغیزمن شي..ځکه چې زموږ د لېږد خدمت نړیوال دی، نو د تحویلي وختونه به ستاسو د موقعیت پورې اړه ولري نو ممکن یو څه وخت ته اړتیا ولري او که تاسو په لرې سیمو یا هیوادونو کې یاست صبر وکړئ.1. د راګرځېدو او بدلون تګلاره
موږ یوازې د roymall.com څخه اخیستل شوي توکي منو. که تاسو زموږ له محلي ویشونکو یا نورو خرڅونکو څخه پیرود کوئ، تاسو نشئ کولی دا زموږ په خوا کې راګرځوئ. د وروستي پلور توکي یا وړیا ډالۍ د راګرځېدو لپاره مناسبه نه دي. د راګرځېدو لپاره وړتیا لپاره، ستاسو توکي باید نا کارول شوي وي او په ورته حالت کې وي چې تاسو یې ترلاسه کړي. دا باید په اصلي بسته بندۍ کې هم وي.له موږ څخه د راګرځېدو لارښوونې ترلاسه کولو وروسته، مهرباني وکړئ خپل راګرځېدلي توکي بسته کړئ او خپله بسته په محلي پوسټ آفیس یا بل کوریر کې پرېږدئ.موږ به ستاسو راګرځېدلي یا بدل شوي توکي په 3-5 کار ورځو کې پروسس کړو وروسته له هغه چې موږ یې ترلاسه کړو. راګرځېدنه به پروسس شي او په اتومات ډول ستاسو د اصلي تادیې میتود ته بیرته ورکړل شي.هیڅ راګرځېدنه یا بدلون نشي منل کیدی که چیرې محصول دودیز تولید شوی وي، په کې دودیز اندازه، دودیز رنګ، یا دودیز چاپ شامل وي.نورې مرستې ته اړتیا لرئ؟ مهرباني وکړئ زموږ سره اړیکه ونیسئ. service@roymall.com یا Whatsapp: +8619359849471
2.د راګرځېدو تګلاره
تاسو به یو بشپړ راګرځېدنه یا 100% پلورنځي کریډیت ترلاسه کړئ وروسته له هغه چې موږ راګرځېدلي بسته ترلاسه او چک کړو. راګرځېدنه به پروسس شي او په اتومات ډول ستاسو د اصلي تادیې میتود ته بیرته ورکړل شي. مهرباني وکړئ په یاد ولرئ چې د لېږد لګښتونه او کوم حقوق یا فیسونه راګرځېدونکي ندي. اضافي د لېږد لګښتونه راګرځېدونکي ندي کله چې بسته ولېږل شي. تاسو مسؤل یاست چې دا فیسونه تادیه کړئ او موږ نشو کولی دوی معاف یا بیرته ورکړو، حتی که امر زموږ ته راګرځېدلی وي.کله چې موږ ترلاسه او تایید کړو چې ستاسو راګرځېدلي توکي، موږ به تاسو ته یو بریښنالیک واستوو چې تاسو ته خبر ورکړو چې موږ ستاسو راګرځېدلي توکي ترلاسه کړي دي. موږ به تاسو ته د ستاسو د راګرځېدنې د تصویب یا رد په اړه هم خبر ورکړو.که ستاسو د راګرځېدو پروسې سره کومه ستونزه وي، مهرباني وکړئ زموږ سره اړیکه ونیسئ. service@roymall.com یا Whatsapp: +86193598494711 Working voltage: DC 6-24V
2 Working current: DC 12-30MA
3 3 independent buttons: used to set frequency, duty cycle, working status, etc.;Support long press, short press, simple operation and diverse functions.
4 3 Channels PWM output: PWM Signal can set frequency and duty cycle respectively.
5 PWM signal level: 5V TTL level
6 PWM signal load capacity: <20mA
7 Output frequency accuracy: 0.6% (10-30 Degrees Celsius)
8 Ultra-high frequency range: 20HZ ~ 1MHZ, duty cycle 0-100%.
9. Power-off memory function: power off at any time, the last set data will be recorded and saved when power off, and the data will be displayed when power is turned on again.
10 Automatic exit function: If there is no operation for 36 seconds, the last set data will be automatically recorded, and the dynamic setting state will be exited.
11. Real-time update function: Under the dynamic setting function, you can connect an oscilloscope to grasp the set frequency and duty cycle at any time, and output the precise frequency or duty cycle.
12. Restore production setting function: in dynamic setting mode, press and hold the UP and DOWN buttons at the same time to restore the production setting (after pressing, you need to power off and power on again, the data will be updated to the default data)
13 kinds of application scenarios: The module has a variety of control methods and working modes, and three output channels, which can meet the requirements of different environments.
14 Dimensions: 49 x 38 x 13mm
15 Weight: 14.5g
PWM signal parameter description:
1 PWM frequency: the setting range is 20HZ ~ 1MHZ. The default value is 100HZ.
Four-digit digital tube, the decimal determines the unit of frequency. When there is a decimal point, the unit is KHZ, and when there is no decimal point, the unit is HZ.
The relationship between the digital tube display number and the output frequency:
0034: Indicates that the frequency is 34HZ
0234: Indicates the frequency is 234HZ
1234: Indicates the frequency is 1234HZ
1.234 : indicates that the frequency is 1.234KHZ
12.34 : indicates that the frequency is 12.34KHZ
123.4: Indicates the frequency is 123.4KHZ
0.123: Indicates that the frequency is 0.123KHZ (that is, 123HZ)
2 PWM duty cycle: setting range 0 ~ 100
0: The corresponding PWM remains low
100: The corresponding PWM remains high
1 ~ 99: corresponding duty cycle 0.01 ~ 0.99
The relationship between the digital tube display number and the output duty cycle
0005: Indicates that the output duty cycle is 0.05/5%
0050: Indicates that the output duty cycle is 0.50/50%
Note: 1. Other combinations are also possible, but whether the data can be more accurate is related to your test tool
Package include:
1u00d7 Module Board
How to set PWM output parameters:
Example 1:
For example, the parameters of the three channels are 100HZ/50%, 200HZ/60%, 300HZ/70%
View the parameters of the three channels:
1 Powered on PWM9B03 module, the PWR indicator is on, and the digital tube is off
2 Click the SET button to display PF1 (for 1 second), and then normally display 0100 (channel 1 frequency 100HZ)
3 Click the SET button twice to display dU1 (for 1 second), and then normally display 0050 (channel 1 duty cycle 50%)
4 Click the SET button three times to display PF2 (for 1 second), and then normally display 0200 (channel 2 frequency 200HZ)
5 Click the SET button four times, display dU2 (for 1 second), and then normally display 0060 (channel 2 duty cycle 60%)
6 Click the SET button five times to display PF3 (for 1 second), and then normally display 0300 (channel 3 frequency 300HZ)
7 Click the SET button six times, display dU3 (for 1 second), and then normally display 0070 (channel 3 duty cycle 70%)
Example 2:
Set channel 1 to: frequency 1000HZ, duty cycle 40%
1 Powered on PWM9B03 module , the PWR indicator is on, and the digital tube is off
2 Press and hold the SET button for 3-5 seconds, first display PF1 (for 1 second), and then flash the number
3 Click the UP/DOWN button to adjust the number to 1000 (frequency 1000HZ)
4 Press and hold the SET button for 3-5 seconds for the second time, first display dU1 (for 1 second), and then flash the number
5 Click the UP/DOWN button to adjust the number to 0040 (40% duty cycle)
6 Re-power
Example 3:
Set channel 3 to: frequency 10.12KHZ, duty cycle 60%
1 Powered on PWM9B03 module, the PWR indicator is on, and the digital tube is off
2 Press and hold the SET button for 3-5 seconds, first display PF1 (for 1 second), and then flash the number
3 Press and hold the SET button twice for 3-5 seconds, first display dU1 (for 1 second), and then flash the number
4 Press and hold the SET button three times for 3-5 seconds, PF2 will be displayed first (for 1 second), and then the number will flash.
5 Press and hold the SET button four times for 3-5 seconds, first display dU2 (for 1 second), and then flash the number
6 Press and hold the SET button five times for 3-5 seconds, first display PF3 (for 1 second), and then flash the number
7 Click the UP/DOWN button to adjust the number to 1012, and then click the SET button to adjust the number to 10.12 (frequency 10.12KHZ)
8 Press and hold the SET button for 3-5 seconds for six times, first display dU3 (for 1 second), and then flash the number
9 Click the UP/DOWN button to adjust the number to 0060 (60% duty cycle)
10 Re-power
Example 4:
Factory Reset
1 Powered on PWM9B03 module, the PWR indicator is on, and the digital tube is off
2 Press and hold the SET button for 3-5 seconds, first display PF1 (for 1 second), and then flash the number
3 Press the UP and DOWN buttons at the same time to restore the factory settings
4 Re-power


![[US Direct] Cloudenergy 48V 600Ah 30.72Kwh Stackable LiFePO4 Battery with 6kw Inverter 60A MTTP 10 Year Lifetime Perfect for Monitor RV, Solar, Energy Storage, Overland, Off-Grid CL48-S4](https://static.roymall.com/d/file/mall/titlepic/232/1tndmik0jen.jpg)